Pom-Pom Decorations
This activity will guide you through how to make Christmas decorations out of pom-poms.
This activity uses scissors and glue, so please make sure there is a supervising adult.
Making a basic pom-pom
- Get a piece of cardboard that is at least 13cm x 13cm. We recommend using sections of a standard cardboard box for this.
- Using a pair of compasses, draw out a circle of diameter 12cm, with another circle in the centre of diameter 5cm.
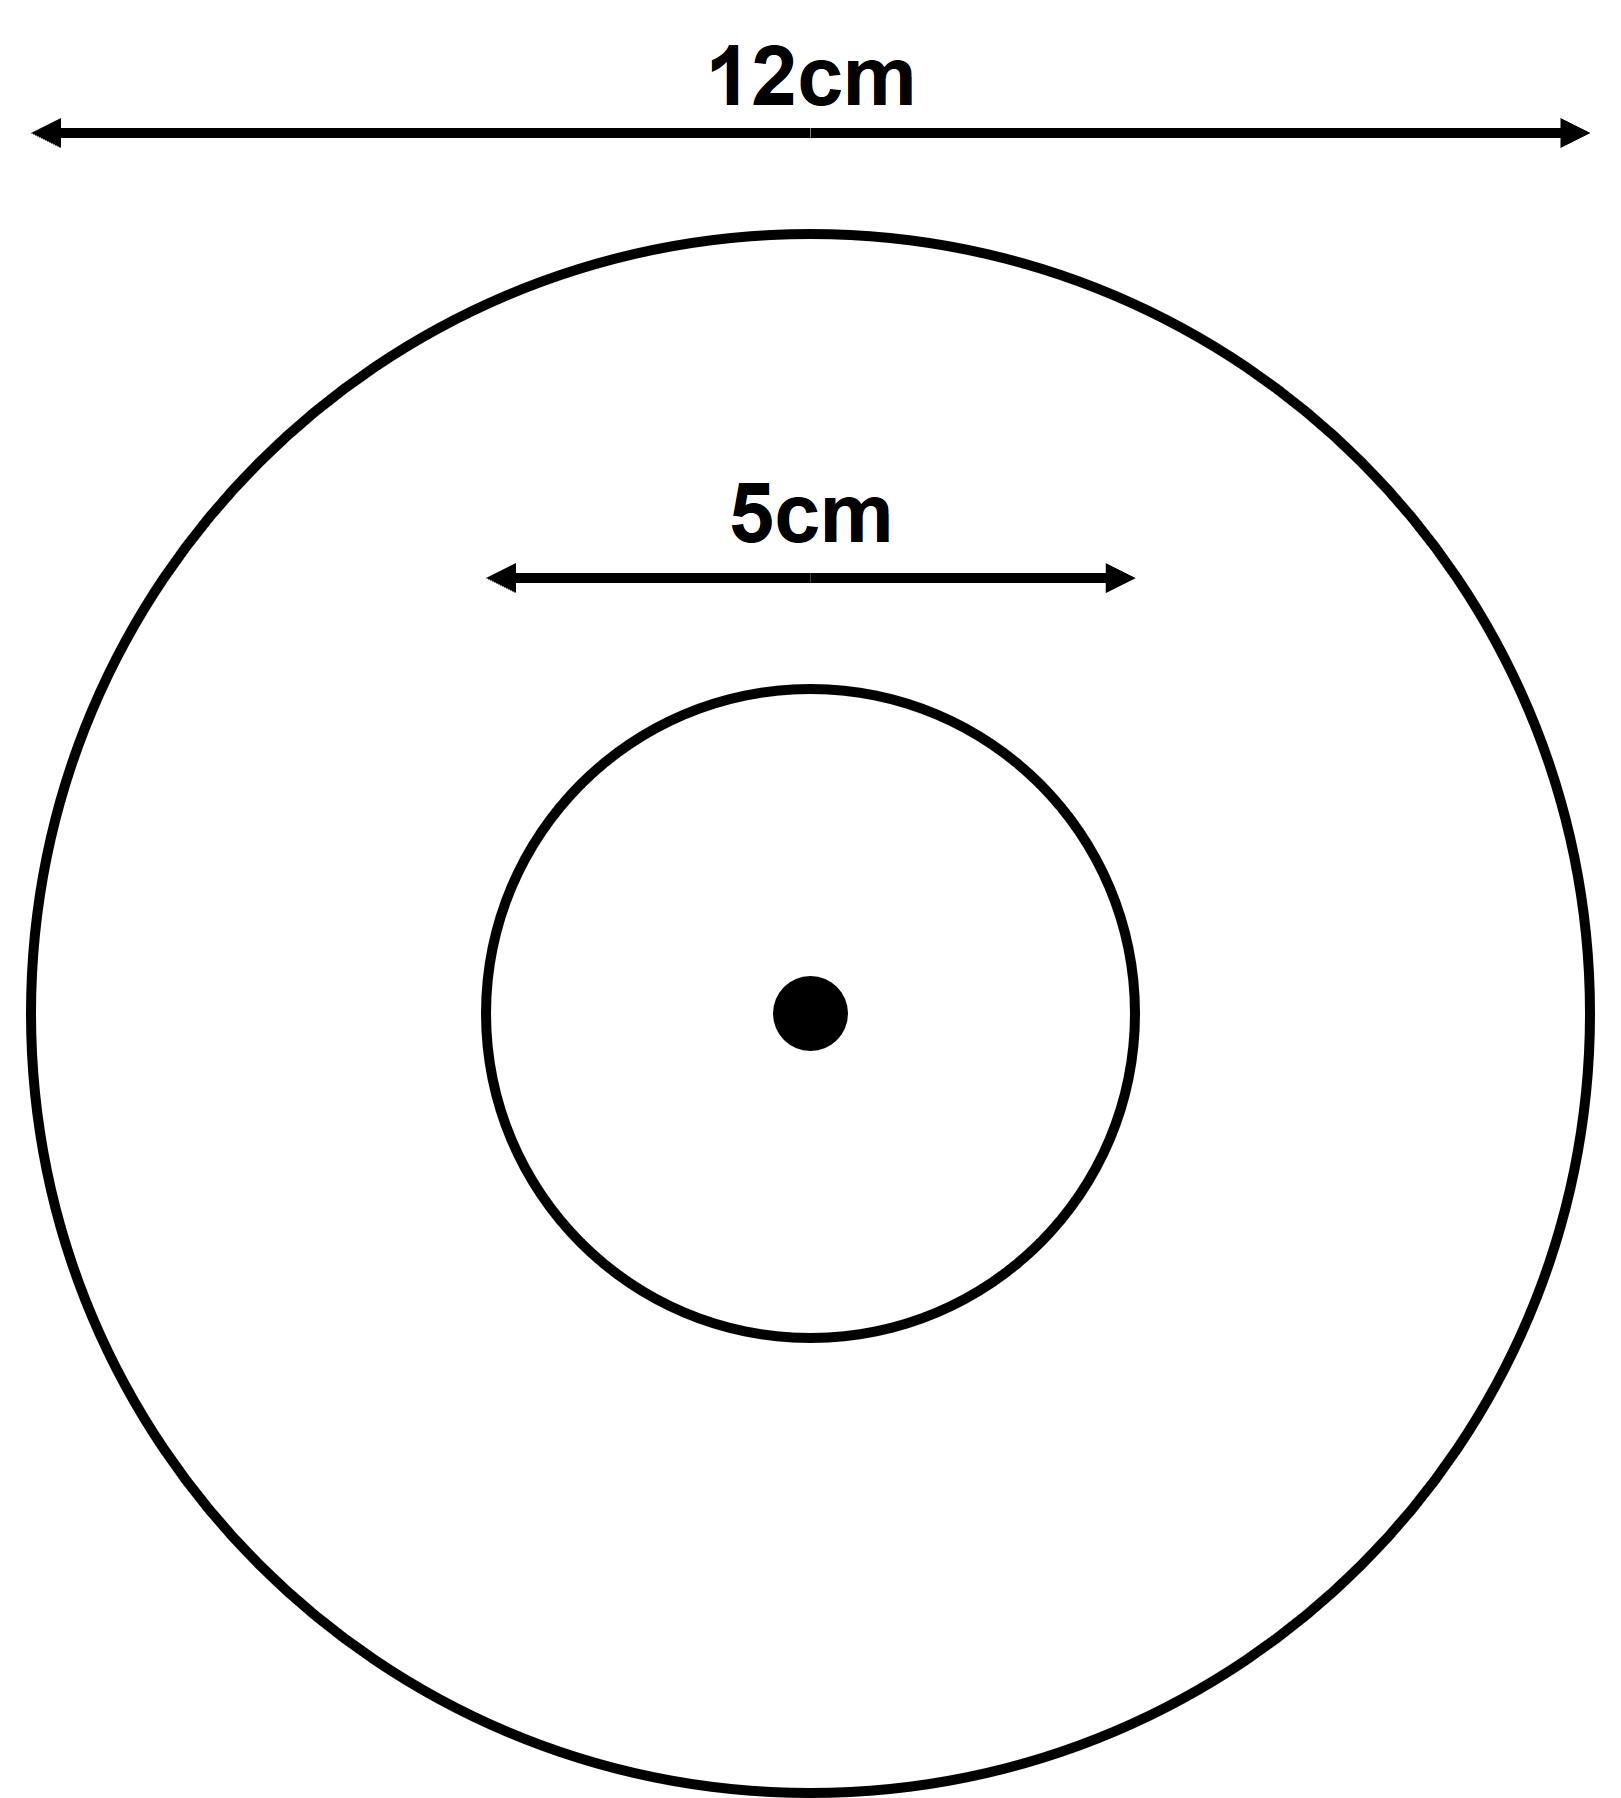
- Carefully cut around both circles to form a cardboard donut shape.
- You need to make a ball of wool that will fit through the donut. Doing this will mean you are less likely to get knots and tangles in the wool.
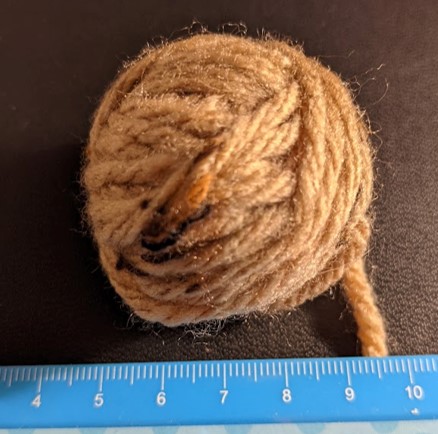
- Then you will need a tie strand. This is another piece of wool 0.5m long. To make this easier to see, use a different colour to the pom-pom.
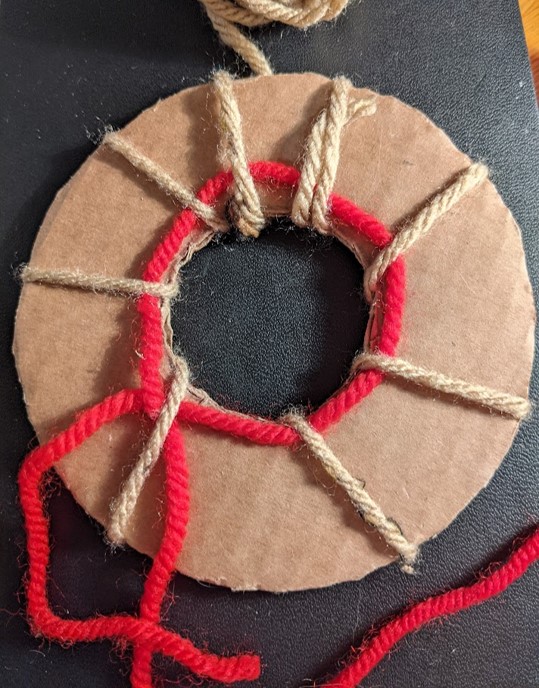
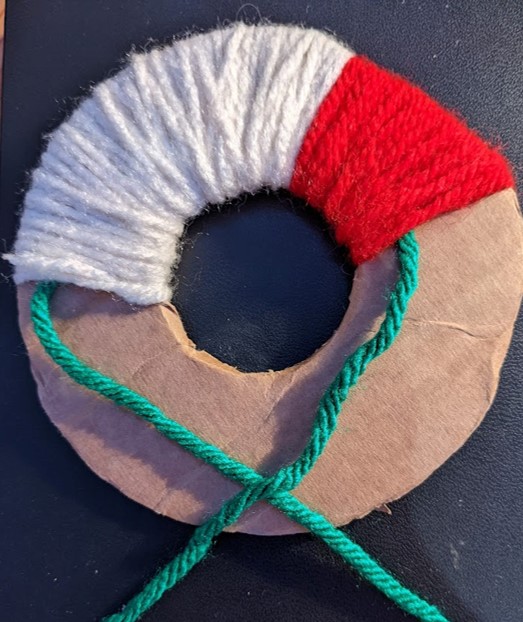
- Start wrapping the ball of wool around the card and the tie strand. See below image.
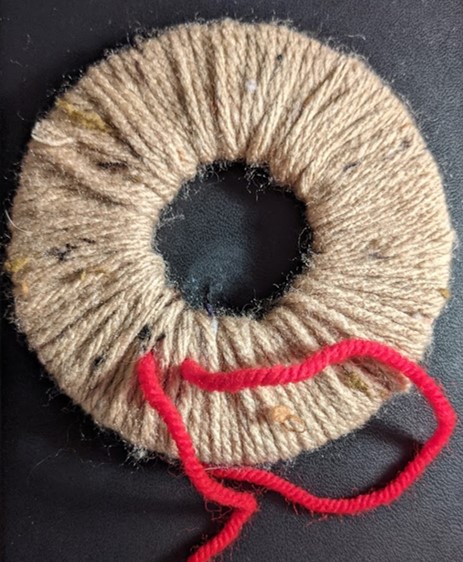
- Now keep wrapping the wool around and around until the donut is completely covered. If you run out of wool, make yourself another small ball and continue with that instead.
- Now for the fiddly bit. Carefully insert a pair of scissors between the wool and the card.

- Whilst keeping a tight hold on the ends of the tie thread, carefully start cutting the wool along the outside edge. You may need assistance to make sure the newly cut strands stay in place until all are cut, and the tie thread tightened fully.
- Once all the threads around the donut have been cut, pull the tie thread as tight as possible around them all and tie a knot in to hold it all together. Trim the tie-thread ends close to the knot to hide them in the pom-pom.
Mine all fell apart! What do I do?
Don't worry if this happens. Just finish cutting all the way around then gather all the threads together into a bundle. Retrieve your tie thread and wrap it around the centre of the bundle. Pull it as tight as you can and tie a knot to hold it all together.
- Remove the cardboard and spread out the threads into a ball shape. Is a strand is sticking out too far, trim it. Do not pull the strand out as it will loosen the hold of the tie thread. Remove too many threads and the pom-pom will fall apart.
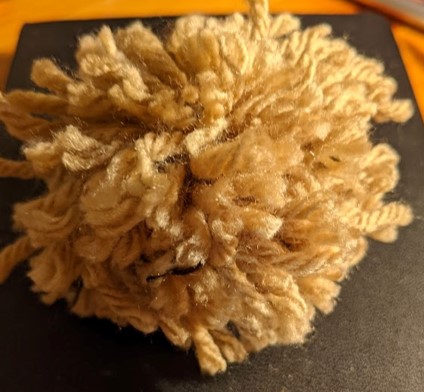
- Well done! You now have a pom-pom which can be hung as a bauble or further decorated.
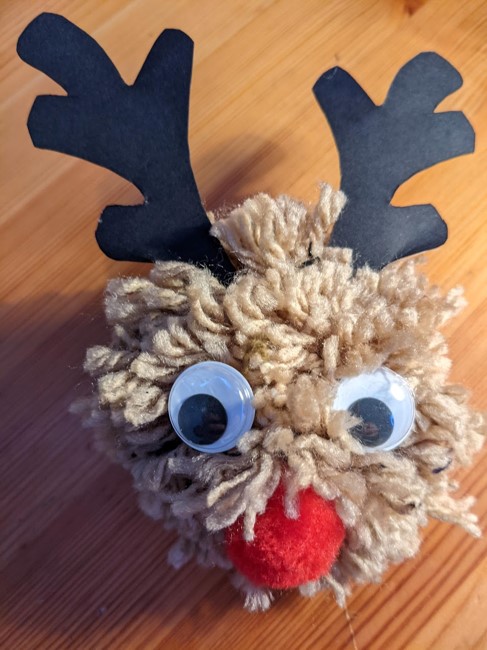
Pom-pom Rudolph
- Make a brown pom-pom using the instructions above.
- Using PVA glue or a glue-gun, stick on some eyes and a red nose.
- Cut out some antlers from brown or black card and stick on. Feel free to use our antler template
Pom-pom Robin
As an additional challenge, can you make a three-colour robin pom-pom?
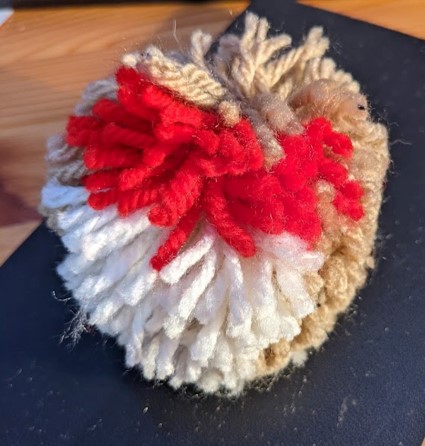
- Instead of covering the whole carboard donut with a single colour, we shall use three. First, we need the donut template (same as that used in the basic pom-pom instructions above).
- Wrap a ninth of the donut with red wool, then a third in white. Don't forget the tie-thread.
Too late. I forgot the tie thread. Do I need to start again?
You do not need to start again. Instead, you can carefully use a large needle to pull in through.
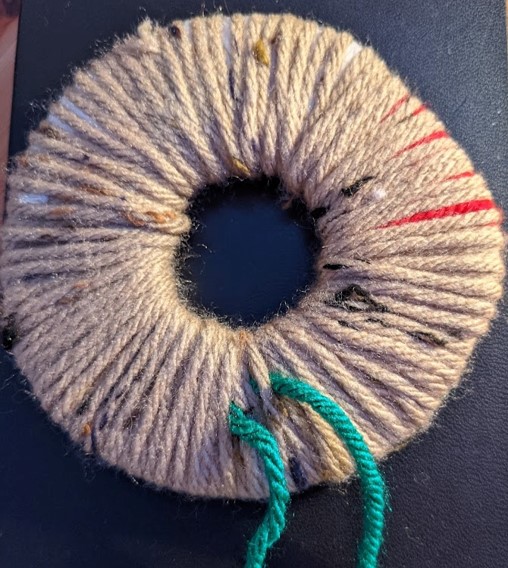
- Now cover the rest of the cardboard with brown wool.
- Add a second layer around the whole donut with the brown wool.
- Now, repeat steps 8-11 of the basic pom-pom instructions. You will then have the main body of your robin.
- Now we need a smaller pom-pom for the head. So, we need a new cardboard donut. The centre circle will again have a diameter or 5cm, but the outer circle will instead have a diameter of 8cm instead of 12cm.
- Use this smaller template to create a basic brown pom-pom.
- Glue this small pom-pom head to the body. You can then decorate with eyes, beak, feet, wings, or anything else you can think of.